
Are you interested in gardening and growing your own plants? Starting seeds is a great way to get a head start on the growing season and ensure you have a bountiful harvest. In this guide, we’ll go over everything you need to know to start your own seeds, from the supplies you’ll need to the step-by-step process and helpful tips.
Table of Contents
Things Needed For Seed Starting
Before you get started, you’ll need to gather a few supplies. Here are the essential things you’ll need:
Containers
The first thing you’ll need is a container to start your seeds in. You have a few options when it comes to containers.
Types and size of container
Seed starting trays and flats are a popular option for starting seeds. They come in various sizes, ranging from small 6-cell trays to larger 72-cell trays. Another option is to use individual pots or containers, which can range in size from small 2-inch pots to larger 4-inch or 6-inch pots.
Where to buy the container
Seed starting containers can be found at your local garden center, home improvement store, or online.
Seed starting mix
Seed starting mix is specifically formulated for starting seeds and is different from potting soil. Seed starting mix is a lighter mix that allows for better drainage and root development.
You can find seed starting mix at your local garden center, home improvement store, or online.
Seeds
Choosing the right seeds is crucial to the success of your seed-starting efforts. You can purchase seeds from a variety of sources, including local garden centers, online seed companies, and seed catalogs.
A few tips to note when choosing good seeds includes;
- looking for varieties that are well-suited for your climate and growing conditions.
- Make sure to check the expiration date on the seed packet, as older seeds may not germinate as well.
Liquid Fertilizer
Liquid fertilizer can help give your seedlings the nutrients they need to grow strong and healthy. You can find liquid fertilizer at your local garden center, home improvement store, or online.
Best liquid fertilizer on the market
Some popular liquid fertilizers for seed starting include fish emulsion and seaweed extract.
Plant markers
It’s important to label your seedlings so you know what you’re growing. You can make your own plant markers using popsicle sticks, wooden skewers, or plastic spoons.
You can also purchase pre-made plant markers at your local garden center, home improvement store, or online.
Journal
Keeping a journal of your seed starting efforts can help you keep track of what worked and what didn’t. You can use any notebook or journal to keep track of your seed starting efforts. You can get specially designed garden journals for keeping records of your gardening journey.
Garden tools needed
In addition to the supplies listed above, you’ll also need a few garden tools to get started.
Hand garden trowel
A hand garden trowel is a versatile tool that can be used for a variety of tasks in the garden, including filling containers with seed starting mix and transplanting seedlings. Its compact size makes it ideal for working in small spaces, such as seed trays and pots.
When starting seeds, a hand garden trowel can be used to fill containers with the appropriate amount of seed starting mix. This ensures that each seed has enough space to grow and provides the necessary nutrients to get the seedlings off to a healthy start. The trowel can also be used to mix in liquid fertilizer, creating a nutrient-rich environment for the seedlings.
Garden dibber
A garden dibber can be used to make holes in the soil for planting seeds. It is typically made of wood or plastic, and has a pointed end that can be easily pushed into the soil.
The depth of the hole can be adjusted by how far the dibber is pushed into the soil, making it an excellent tool for sowing seeds at the right depth.
The benefit of using a garden dibber is that it allows you to plant seeds at a consistent depth, which is crucial for seed germination. If seeds are planted too shallow, they may not receive enough moisture or warmth to sprout.
If they are planted too deep, they may not be able to push through the soil to reach the surface. By using a dibber, you can ensure that each seed is planted at the appropriate depth, giving it the best chance to grow into a healthy plant.
Spray bottle
A spray bottle is an essential tool for watering seedlings as it allows for a gentle and controlled water application. It’s important to not overwater your seedlings, as this can lead to rot and other issues. A spray bottle allows you to mist the soil surface, ensuring it stays moist but not waterlogged.
Using a spray bottle also helps to prevent soil disturbance, which can be harmful to delicate seedlings. Pouring water directly onto the soil surface can displace the soil and expose the roots, leading to damage or even death of the plant. By misting the soil with a spray bottle, you can prevent soil displacement and ensure that your seedlings are protected.
Overall, a spray bottle is a useful and inexpensive tool for starting seeds and caring for seedlings. It allows for precise watering without disturbing the soil, ensuring your seedlings stay healthy and strong.
The Seed Starting Process
Now that you have all your supplies and tools, let’s go over the step-by-step process for starting your seeds.
Step 1: Fill your container with seed starting mix, leaving about 1/4 inch of space at the top.
Step 2: Make a hole in the soil using your dibber.
Step 3: Place one or two seeds in the hole.
Step 4: Cover the hole with soil and gently press down.
Step 5: Label your container with a plant marker.
Step 6: Water your container with a spray bottle.
Step 7: Place your container in a warm, well-lit area, such as a windowsill or under grow lights.
Step 8: Keep the soil moist but not waterlogged by misting with a spray bottle as needed.
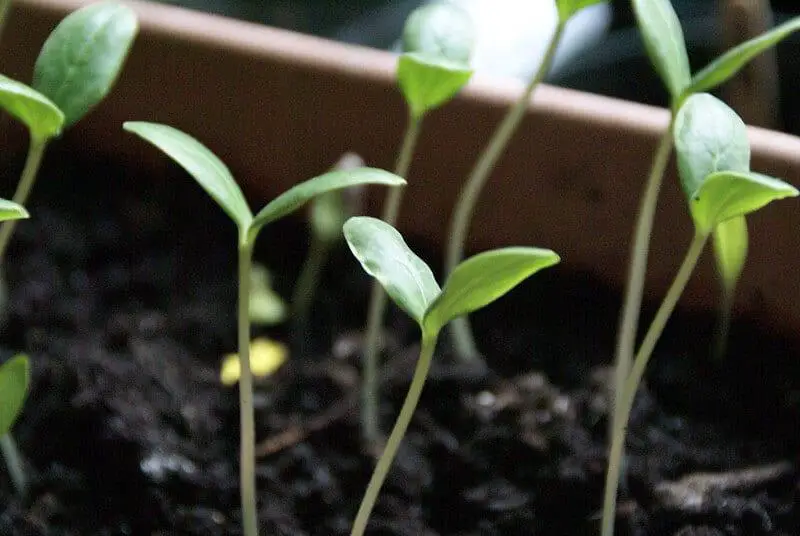
Step 9: Once your seedlings have grown to a few inches tall, you can transplant them into larger containers or outdoors into your garden.
When to Start Your Seeds
The timing for starting seeds will depend on the specific plant you are growing and your climate. Generally, you’ll want to start your seeds 6-8 weeks before your last frost date.
You can find your last frost date by searching online or consulting with your local garden center.
Things to Note
It’s important to keep a few things in mind as you start your seeds. First, make sure to keep your seedlings warm and well-lit. You can use a heat mat and grow lights if necessary.
Second, make sure to keep the soil moist but not waterlogged. Overwatering can lead to root rot and other issues.
Finally, make sure to harden off your seedlings before transplanting them outdoors. This involves gradually exposing them to outdoor conditions over a period of time.
FAQs
Q: Can I use regular potting soil for seed starting? A: It’s not recommended to use regular potting soil for seed starting, as it can be too heavy and not allow for proper drainage and root development.
Q: How often should I water my seedlings? A: You should mist your seedlings with a spray bottle as needed to keep the soil moist but not waterlogged.
Q: Can I reuse seed starting mix? A: It’s not recommended to reuse seed starting mix, as it can harbor diseases and pests.
Links to External Resources
Here are some helpful resources for further information on seed starting:
- University of Minnesota Extension: Starting Seeds Indoors
- The Old Farmer’s Almanac: Starting Seeds Indoors
- Burpee: Seed Starting
Conclusion
Starting seeds is a great way to get a head start on the growing season and ensure you have a bountiful harvest. With the right supplies, tools, and knowledge, anyone can start their own seeds and grow their own plants. Happy planting!